How to make a terrain brush in Tiled
How to make a terrain brush in Tiled
Hello!
Please forgive me if this has already been posted somewhere, I made some searches but I could not find anything on this subject, so I thought I might share it.
One of the most powerful features that Tiled has is the terrain brush. In some ways it's similar to the stamp brush, but it has several advantages of its own. For example, let's say that you're making a dungeon map. You're working on the walls with the stamp brush, placing individual tiles one by one. You might copy-paste them for large extensions, but then you have to micro-manage the corners every time the wall turns to face a different direction. That process can be very time consuming. Enter the terrain brush.
When calibrated correctly, the terrain brush allows you to paint entire areas on the map, and, in the previous example, it will "figue out" which walls should be facing east, west, north, south; it will also figure out where to put the corners, which saves a lot of time.
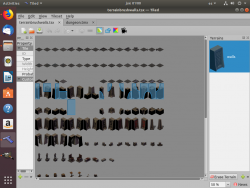
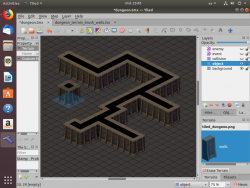
Yet, setting it up correctly can be tricky. Here are a few screeshots of a simple "wall terrain" for the dungeon tileset. The first one shows you which tiles you need to select in the "Edit Tileset" window. The second one is just an example of it being used.
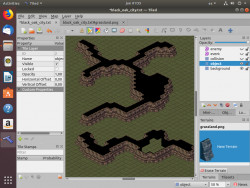
EDIT: Added two other examples for the grassland terrain. If you had to make those mountain walls using only the stamp brush, that can take you several minutes, if not an entire hour. By contrast, using the terrain brush, it only takes you a couple of seconds. There is still some micro-management to make, like in the green tiles inside of the wall. But those can be quickly fixed by using the eraser on the background layer.


Update: You might be wondering "what if I want to add some variations and details to the walls, do I have to use the stamp brush on each individual tile, after I use the terrain brush?"
Well, that's one way, sure, but it's extremely time consuming. The terrain brush allows you to automatically generate those variations, you just have to tell it what to do.
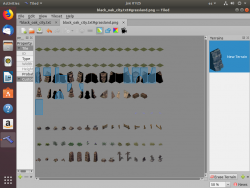
Here's an example: consider the cave tileset. A single wall tile, facing south-east, can have mushrooms, or rocks, or spiderwebs, or spikes, etc. You can tell the terrain brush to take this into account. There's no easy way to explain this in just a few paragraphs, but if there's interest, I could write a more lengthy step-by-step tutorial. For now, I hope the following screenshots can give you an idea of how the selection of the tiles should look. The walls in the last screenshot took only a couple of seconds to make, notice that some have mushrooms, some have spiderwebs, etc.
The terrain brush is definitely cool, but we've been using Tiled's automap feature to achieve a similar goal. If you load up one of the templates (ex. tiled/cave/cave_template.tmx), you'll notice there is an "automap" layer. From the available tilesets, there should be one called "set_rules". With the tiles here, you can paint into the automap layer and then run Map > AutoMap (shortcut: A). This will fill in the non-automap layers with the appropriate tiles (including collision). Our automapping rules also support variation where possible, like with the cave walls. Granted, I think we only used automapping because it predated the terrain brush (or was more stable at the time).
I think that automap is way better than the terrain brush. It's certainly even faster, since it fills the collision layer, unlike the terrain brush. I checked the cave_template.tmx and messed around with it a little. The randomization is done very nicely, every time I press "A" it alternates the wall tiles for example, rendering mushrooms, spiderwebs, etc.
The thing about Tiled (I think you might agree here) is that it's a little bit tricky at first. When I tried to set up the wall terrains for the dungeon and cave, I realized that I could not rely on intuition to do this (maybe with orthogonal tiles it's a bit more intuitive). I had to use a sort of "trial and error" method in order to get the tiles facing the right directions.
But yes, once you get the hang of it, Tiled has a lot of extremely powerful and time-saving features. Automap is definately a joy. I've been messing around with the Wang sets lately, but I don't think I'll actually use them for making Flare maps.