Six steps to a primitive tile-set
Six steps to a primitive tile-set

Inspired by http://opengameart.org/content/seamless-tileset-template I created two stencils. They can be used to create simple tilesets as described below.
Step 1.
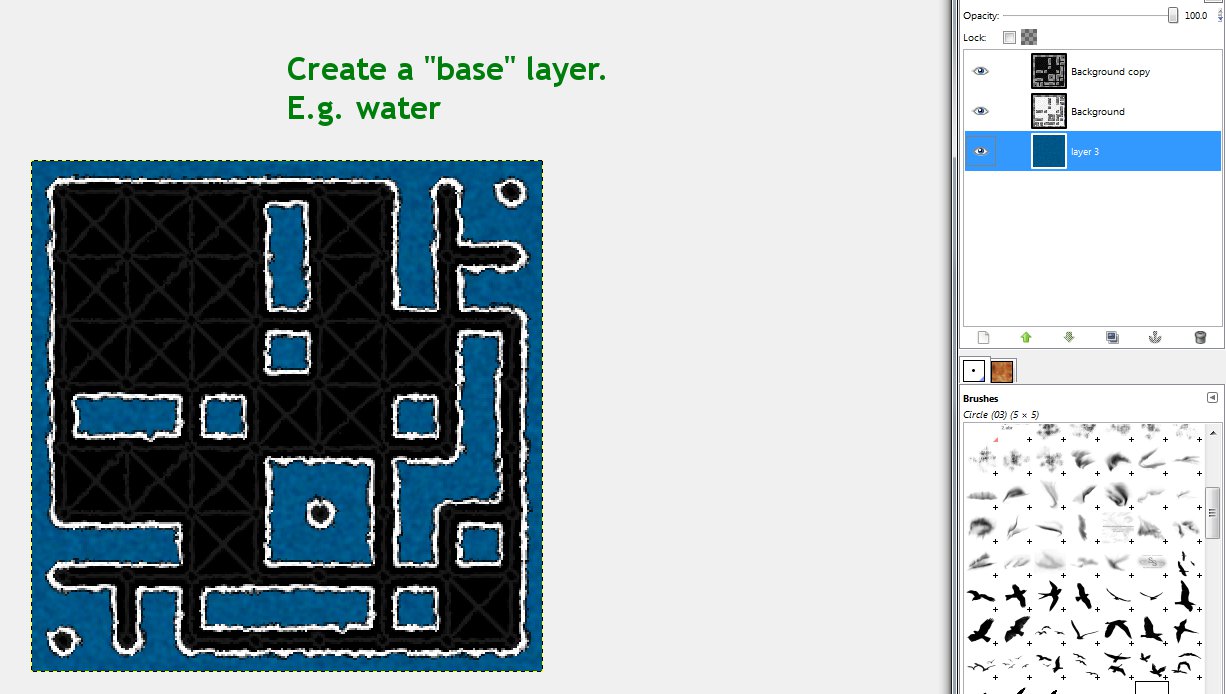
Open the template. It has two stencils and a water layer as the "base" layer -- the lowest layer. You should change it to your own. For example if you want to create the transition from grass to dirt, the base layer should be "dirt".
Step 2.
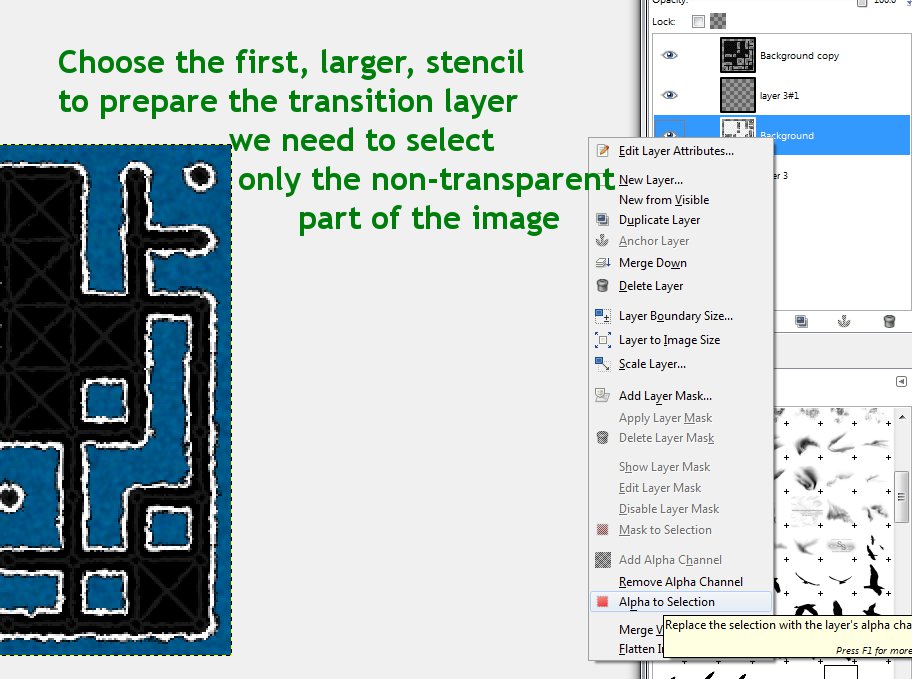
Make the layer with a larger (white) stencil active and select everything non-transparent. This way we will limit the area which we are going to fill with the transition color/texture.
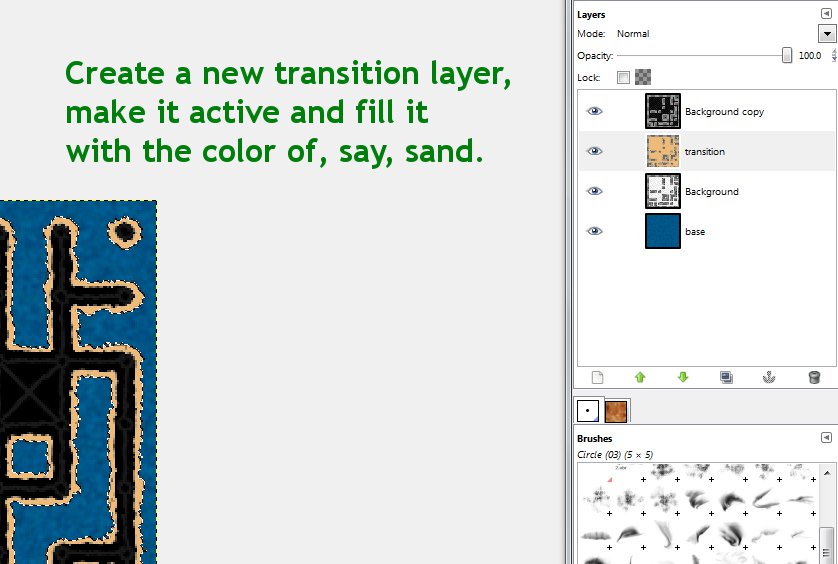
After the non-transparent area of the larger stencil is selected, create a "transition" layer right above it and fill it with the appropriate color.
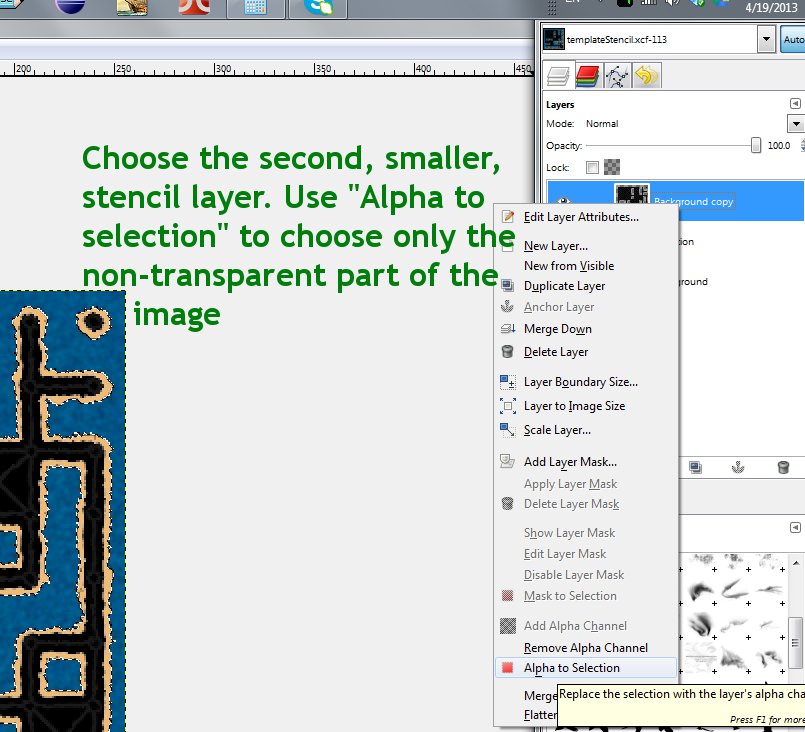
Step 3.
Do the same for the top layer. Select the layer with smaller (black) stencil. Limit selection to everything non-transparent.
Step 4.
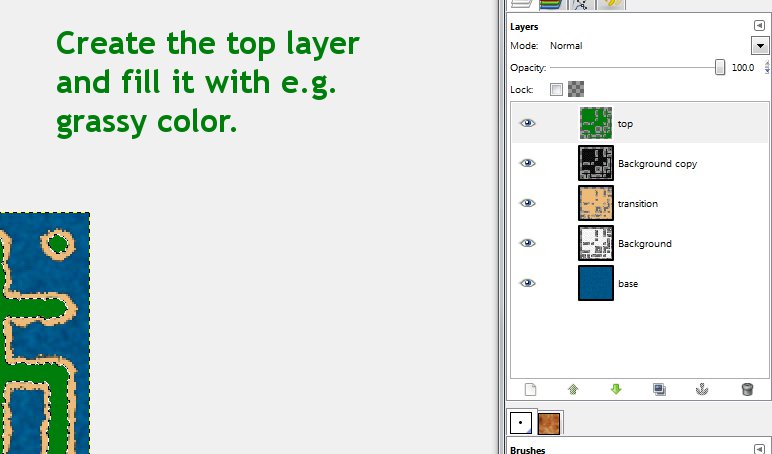
Create the top layer and fill it with the color of your liking. Now you will have three layers: base-->transition-->top.
Step 5.
Create color variation by adding some noise to each layer. You can play with the color/hue/brightness-contrast./color curves etc. adjusting the final result.
Step 6.
Save the copy of the image as PNG and open it in Tiled map editor to try.

I've edited your post to fix the formatting a bit.
Thank you, CruzR.