Made some pixelart. Looking for suggestions for improvement.
Made some pixelart. Looking for suggestions for improvement.
I'm trying to learn to make my own pixelart, and I put this together. It took much longer than I was hoping it would, and looks like it still needs some improvement.
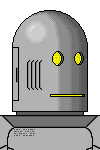
This is for a game I'm hoping to make, if I find that I'm capable of making decent enough pixel art. The character design may be a little generic... truth be told, I kinda like the generic feel... or maybe "classic" is a better word. I'm a particular fan of the cooling vent on the side of the head and the access door in the back that makes it feel like real "version 1.0" so to speak, like these are the first batch of robots ever made or something.
I'm pretty pleased with the general shading on the head (I drew a sphere and a cylinder, cut each in half, and put them together), but everything else feels lacking in terms of detail. Thing is, I'm not sure how to add detail that doesn't look terrible (lol). Of course I have several layers in the project, so I can swap out the colors of the eyes/mouth and add shutters over them to act kind of like eyelids.
Also I kind of wanted to be able to angle the robot's torso and not just its head, but I couldn't figure out the perspective on a cylinder. I saw some tutorials on drawing cylinders under perspective, but couldn't figure out how to draw a skewed ellipse.
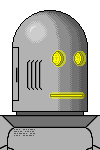
The image with the eyes lit up looks bad to me. I just drew some of the eye color and made the layer transparent.
Thanks in advance for any suggestions.


One place to start improving on is your metal rendering. Try doing a Google image search for "metal cylinder". Notice that cylinder colors are rarely a smooth left-right gradient of shades of gray.
Metal cylinders usually have bright and dark stripes mixed in, which are reflections of lights and objects around that cylinder. The stripes facing the main light source tend to be brighter and yellower. The stripes facing shadows are darker and more blue/purple.
With pixel art you don't have to get nearly that detailed. Just a few colors and stripes will make it appear metallic. Take a peek at the tin can from my Recycle Items Set:
Notice even those the can is a gray metal, it has some green and blue and purple. The stripes are not arranged in a smooth gradient, instead it's mixed up some.
I also notice you used some dithering to shade the metal. That can work with the right style. But usually, dithering adds some implied roughness/texture. It will make your metal feel less smooth and shiny compared to having hard edge stripes.
---
Another thing you may notice about that tin can is there are horizontal ridges. The detail is not drawn on the metal with a black line. Instead it's implied with the colors. If you understand the way your main light is pointing, you can easily add in convincing ridges, bevels, seams, rivets, shadows, etc. by moving up or down one color on your palette.
On your robot you have black lines to show a panel and a vent. That's fine for a simple art style, but it won't help your material look metal. Try using your color ramp instead to imply where the lights and shadows are catching these raised/lowered features. Example:
This is singularly one of the most helpful, clear, and concise pixel art tutorials on the entire internet. I'd easily put it in the top five not just because it is so beginner friendly, but *manages* to be so beginner friendly *while* packing so much style, technique, and guidance into such a small response.
Thank you Mr. Bellinger for taking the time to teach others.
Wow! I applied just one of your suggestions there--the one about the details being implied rather than defined--and it already looks way better. See attached. Thank you!
But I have a follow up question about the metallic shading. I was shooting for a little more flat finish, like these:
Looking at it closely, my finish doesn't look much like those at all. I can see fibers running through the above image, but I doubt I can make anything like that look convincing without a much higher resolution. However, it does also have harder edge lines, like you were mentioning. Maybe I can imply fibers by adjusting the edges of these lines? I'll play with it and see, unless anyone has any suggestions.
I think the thing to notice is that in clint.bellinger's examples is that the gradient does not
move strictly from light to dark. This is true in the photos also. Not there is a small highlight, a large dark section, a stronger highlight and then another dark spot and then mid level at the edge.
My suggestion would be to make his eyes and mouth a bit bigger to fil in all that empty space. Might not be the look you are going for but worth a try.
https://withthelove.itch.io/
oh also, the highlights run along the length of the cylinder as opposed to forming a tight ball.
https://withthelove.itch.io/
Here's a really rough draft trying to apply similar shading as clint's tin can to Robo's head. The top is pretty much unfinished, and I don't know that I got the size of the highlights/etc. right. So basicaly it doesn't look very good, but hopefully it at least demonstrates the idea.
Something else to consider, the light currently comes from the upper left, but the character is facing the right. This means most of his face is in shadow. Might make more sense to flip the light to the upper right so the front of Robo's face is the lit up part.
https://withthelove.itch.io/
Oh man that is beautiful. Way, way, WAY better. :D
I suppose I also need to reserve another shade of dark gray for the corner of the mouth, edges of the eyes and maybe the outline.
:)
I don't know about way, way, WAY better, but I'm glad you found it at least useful!
https://withthelove.itch.io/
Here we go. Needs better shading on the body, but this is a marked improvement, I think. As it is, the body looks plastic while the head looks metalic.
Thanks to both of you for your suggestions! I don't dislike the plastic look, really, but they should be the same material.
I looked up a metal surface of what appears to be the same material, but I'm not sure how to make this look right on angled surfaces. Any tips?
So, flat areas of metal technicall would work sort of like mirrors. But there's nothing around the robot to "reflect" here. So I'd say to continue using the bands of light and shadow, even if it wouldn't exactly work like that on a flat surface.
I tried a few things here:
- Use stripes to shadw out the body
- tweak the top of the head. Have each band of color curve around and meet on the other side
- Added a slight implied lip to the bottom of the head
- Thickened drop shadows in a couple places to help imply depth
Feel free to ignore these if it's not the style you're thinking. But it's kind of how I would go about it.
Whoa, cool! :)
Looks great. I'll play with those same ideas a little.
Shading on his body looks amazing!! Clint u r incredible!!!
Two thoughts on the head:
the highlight cutting right through the center of his face is a bit distracting.
Since it's a portrait his face should be the priority and the main thing that grabs your eye.
Right now, for me, the shading is what pops out and his face seems a bit either stuck on top of the grey bands or hiding underneath them. You might do well to dial back the number of bands/shades, and try to arrange them so there is a nice solid light grey piece right to the right of center for his face to sit on. If you donit right, you sbould still be able to imply the cone shape but with fewer bands.
This is also important because with the number of shades/bands you use on his face, you're setting the bar and level of detail you'll want to use elsewhere in order to keep the image consistent. There's some leeway there, but generally you want to use a similar number of steps from light to dark throughout the whole image. As an extreme example, imagine his head has 100 shades of grey from light to dark, but then his body only uses 3 shades from light to dark. They won't look like part of the same image at all.
Second, there's kind of a perspective cheat going on right now with his mouth and face in general being perfectly horizontal but the shoulders now tilted and base of head showing some perspective and rounding. You might try putting a little curve in his mouth and offsetting the eyes from one another in order to angle his face a bit to match the new angle of his head. This mismatch in perspectives may be part of the reason I am seeing the face as pasted over the shading.
https://withthelove.itch.io/
Ok so I made a few adjustments in response to feedback but I have come across another shading roadblock.
Clint, I essentially copied your shading but tried to make it look a little more dull. I think I succeeded in that but now it looks like it's painted, lol.
Anyway, the weird part is the mouth, which I'm guessing was pretty easy to notice.
Here I've taken off some layers to show that the face should actually be all on one plane embedded below the surface of the cylinder. The above layer adds sockets around the eyes to try to accomplish this, which is simple enough, but the mouth hole is tricky, resulting in the above image that looks like it really badly needs to see a robodentist. Any suggestions? I guess one option would be to make his actual mouth light much larger than the hole but I can't think of any reason that a robot manufacturer would do this. I dunno how much can be done with shadows either since the mouth is a light.
BTW, thanks for the suggestion about the shading on his face. That makes a lot of sense, and I'll look into that later. I didn't want you to think I was ignoring it. :)
I made a few adjustments. Capbros, I adjusted the shading a little bit to look more like you were suggesting.
Also I added the dark yellow color to the "jagged teeth" so that it looks more likea surface with the yellow light bouncing off of it. Looks ok I guess.
And I made the middle chest panel a little lighter in color so the contrast isn't as high and it looks less like the shading is painted on.
This is definitely one of the most helpful, uncomplicated and amazing tutorials on the internet. To think that this:
Some more thoughts:
His eyes are actually ok to be the same size, but they should be offset in y slightly, to account for the now isometric type angle.
The angled mouth is definitely an improvement on the stratight horizontal one, but it should have more of a curve to it, to match the curvature of his head.
I think I know what you are saying about the face being a single plane cut into the cylinder. But the cylinder still has a curve to it, so the mouth hole and eyes need to reflect that.
There's still something off between Clint's stellar shading on his body and what we've come up with for his head. The body highlights just have a more natural, organic look to them. They are a bit random, notice taht not all the bands are straight lines. The head by contrast is a bit mathematical still. It's just a really clean gradient.
Did a quick and dirty mock of offsetting the eyes and curving the mouth.
I also had a go at reducing the gradient a bit to illustrate my point about it drawing attention away from his face. I just used the fill tool to to this so it's pretty rough, but I think it shows what I was talking about. Notice how w/ fewer highlights, and especially none running through his face, it puts the emphasis back on his facial features?
Again, it's pretty rought, also I thought it still needed some highlight, so I tried roughing one in just on the top of his head, but I think that pushed him back to being a bit plasticy.
https://withthelove.itch.io/
Actually, I took careful care with the perspective because that's one part of all this that I feel like I understand decently well. Hopefully the attached expanded image with the vanishing point in view will make it clearer.
But the mouth definitely needs more curve now that you mention it. Looks like the bottom of the cylinder head does too... Hopefully the difference is noticeable.
I see what you mean with the vanishing point, I guess that explains the size difference.
But the y offset is not because of the vanishing point, it's to match the curve of his head. The two shouldn't be aligned perfectly horizontal in the image for because his head is curved, so just like his mouth and his chin, the eyes should align along a curve. Does that make any sense?
new mouth looks great! that bit of extra 'lip' really sells it!
https://withthelove.itch.io/
I started reading this thread from bottom to top, and man the robot looks great! Plus the replies here are being very helpful :D
I just want to point out a detail at the back of the robot's head (sorry if I'm nitpicking). The top and bottom lines of the panel should follow the cylinder's circumference, because the panel is part of the cylinder. I've made a quick example. The left one shows straight lines, regardless of the curve. The right one shows line following (or attemping to) the curve.
maruki's right about that panel, it sticks out now that the perspective is corrected in other places.
Also, I think the bottom of the cylinder may need cleanup. The curve should follow the bottom half of an ellipse. Here I used the Ellipse Select tool and selected an area that fit the left, right, and bottom of the cylinder. I colored in Blue where I think there are missing head cylindier pixels.
Ah, good catch maruki and Clint.
I also noticed while redoing the panel that the shading on it still assumes the light is in the top-left, so I swapped the left/right colors on that.
Oddly, when I tried adjustinging the shading on the vents so that the flat surfaces were lighter than the curved cylinder, it looked terrible, so I left it the way it was.
Now the three vents need to adjusted to match the curve a bit.
maybe pull the rightmost one down a pixel?
https://withthelove.itch.io/
I played around with it a little bit. I think the key is that the slope increases the farther you move from the center, but I tried moving the outermost up by two pixels and that was too much.
Alrighty, got another sprite.
I think the panels on the shoulders and the top there are too small to shade effectively with streaks and stuff. At least I couldn't get it to work.
Any comments?
Looks good! My only comment would be that there is an inconsistency between the head and arms which use kind of a heavy 4-5 shade gradient, and the chest which uses a much simpler 2 shade gradient.
https://withthelove.itch.io/
I would say on the body frames the edge shading is causing issues. You have a single pixel stripe on top/left that is brighter, and on the right/bottom it's darker. Because every panel has this one pixel border, it makes each panel look flat and facing the viewer. Kind of like old style GUI buttons, it just has the appearance of sticking out slightly instead of giving the robot form.
Here, some suggestions.
This one pays more attention to the main light direction, and makes sure each panel's brightness and edge visibility is relative to that.
I lightened the internal sepration lines on the panels. Those fine lines wouldn't be so dark from this far away. Dark lines should be saved for clear separations of depth. Notice I kept the dark line separating the head and the body, and between the shoulders and arms. Those are important to reading the main shapes, in the same way that the black cartoon outline separates shapes from the background.
Wow, just a few little changes to shading and it looks a lot better. :)
I took a few liberties, in particular with the light stripe on the right side of the torso and the shoulder panels just below the head. Also I added just a subtle touch that adds an extra shade to the torso gradient. Hopefully it looks good.
So believe it or not, I'm actually still working on this.
This one obviously needs some work but I'm kinda stuck on how to make it look better. Also missing the maintenance hatch because I didn't know how to make that work in such a small size. I always assumed small sprites were easier to make, but maybe that's not always true. @_@
This is the one I've spent the most time on. I was hoping there might be some suggestions on the head, legs and feet. I really kinda wanted a more rounded foot but I couldn't figure out how to make that work in this perspective.
Here's the same sprite with vanishing lines... and, as I just noticed, an oval that is offset from where it belongs because I forgot to move it when I moved the head, lol.
Here's the "get hit" version of the above sprite. It looks bad to me... How can I make it look better?
The trouble is with the perspective. If I use a perspective transformation to view the robot head-on, you can kind of see what I'm talking about. His right side (the side on the viewer's left) is larger than his left side in that perspective.
I used the warp tool to stretch his proportions so they were roughly symmetrical, and then transformed him back into perspective:
Obviously, after image manipulation, this is no longer pixel art, but it demonstrates what I think the issue is in terms of proprtions.
In general, it's pretty hard to do this by eye alone when drawing in perspective, but you don't have to. If you draw a rectangle in perspective, you can find the center by drawing an X from corner to corner. The center is where the lines cross. You can further subdivide that so you have a grid to work with that you can use as a guide.
Hope that makes sense. :)
Ok that grid trick might just be the most amazing thing I've ever heard. Totally going to try that.
Ok, redid the perspective one, hoping this is found much improved. For some reason the legs look wrong to me still... what do you guys think?
And some new stuff...
An enemy! I'm wondering if there's a good way to rotate his head by very small angles without introducing new colors or making the weird "creases" effect you often see with dynamic sprite rotation. I'm guessing not, and if not then just straight will be fine.
There's too little camera zoom, or like a pinhead lense, a fisheye effect. try to be a bit more isometric.
As for metal, think of a bended mirror, and any reflection is in the right angle to the surface. For that reason, on the top of the head, those lines aren't fully correct, they should end at the very top.
In 3D, we simply put a cubemap onto something, that will reflect surroundings,and funny enough, often you have to add the reflection of a nonexisting sky and horizon to make it look in any way believable. By using very small cubemaps one can also achieve blur reflections, that looks more like a slightly rough surface.
Well, 3D is not 2D, still hope it may help.
how to connect with you Devsmanv
maybe someone knows how to find the person I need Devsman