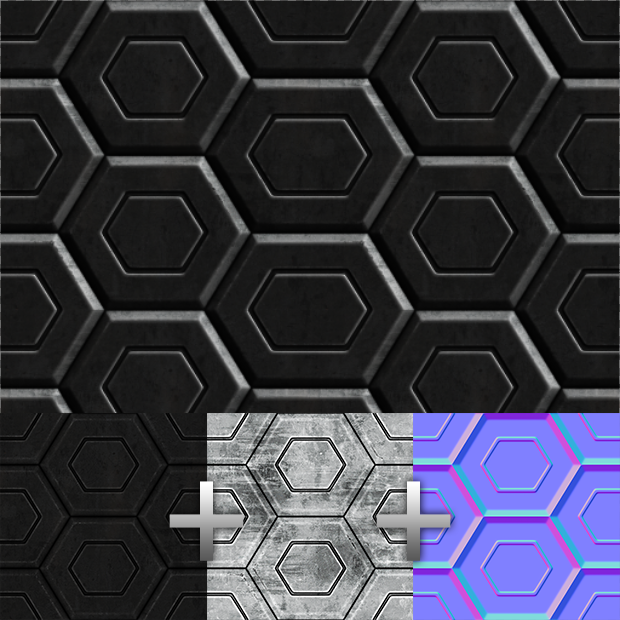
Normal + Diffuse + Specular = Baked lighting information for old engines or backgrounds
Normal + Diffuse + Specular = Baked lighting information for old engines or backgrounds

Hello.
In this tutorial I'm going to show you how to use a Diffuse, Specular and Normal Texture to create a texture with lighting effects. This can be useful for backgrounds, or textures for games with simple graphics. If your target textures are tileable, your end result with the lighting will be as well.
I'm gonna use my Hexagon Texture I made for this website. You can go ahead and download them to follow along here:
http://opengameart.org/content/sci-fi-hexagon-texture
Though my Photoshop is German, I'm gonna translate the different options I used so that you can follow along anyways. Also, you can click on some of the images to view them in full-size because I had to scale some down a little.
So let's get started.
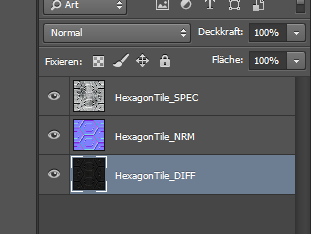
First go ahead and import all the textures into one project. You can use any texture with a normal and specular map for this. Actually, the specular map is optional, but it can add additional material definition to your texture. Otherwhise it will look like it's very clean and smooth, but it might be what you want.
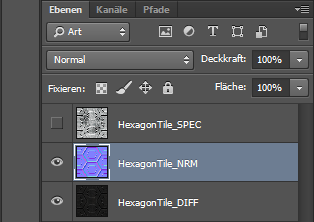
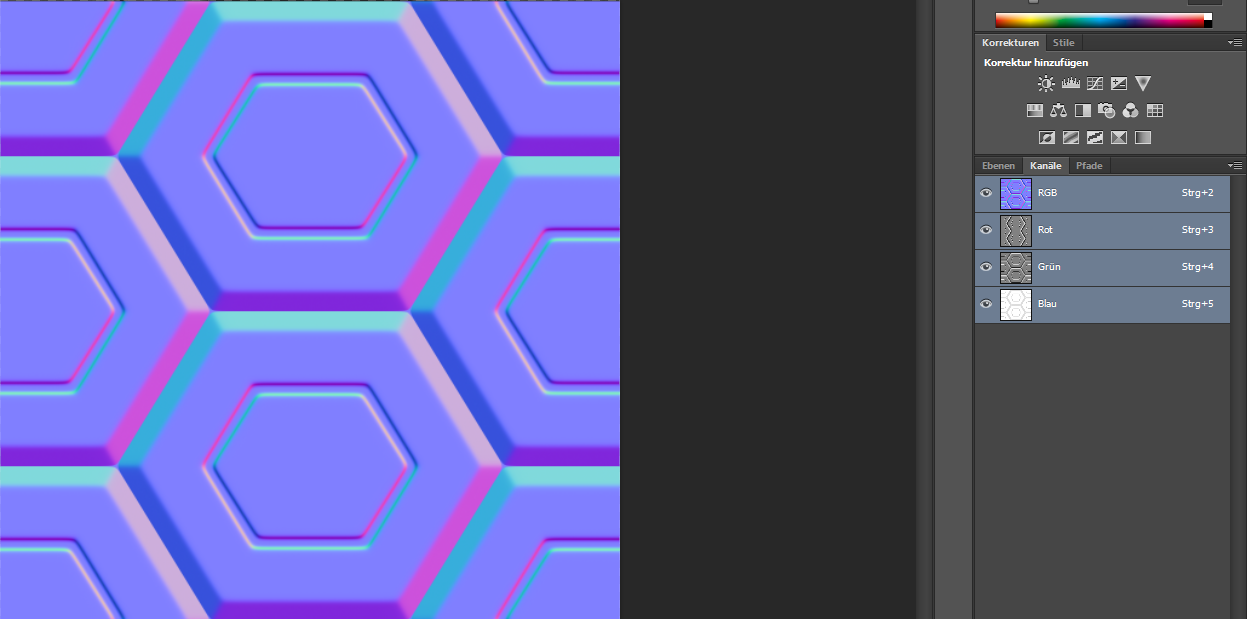
We need the specular texture at a later time, so I shut it off for now. We need to work in the normal map first, so go ahead and select it and switch over to the Channels panel.

A normal map literally consists of bevel and emboss-lighting. The red channel holds the lighting coming from the right, and the green channel holds the light coming from the bottom. (Though it depends on the software you use, sometimes the channels are inverted, but in this particular example it is how I explained.)
Select the green channel...
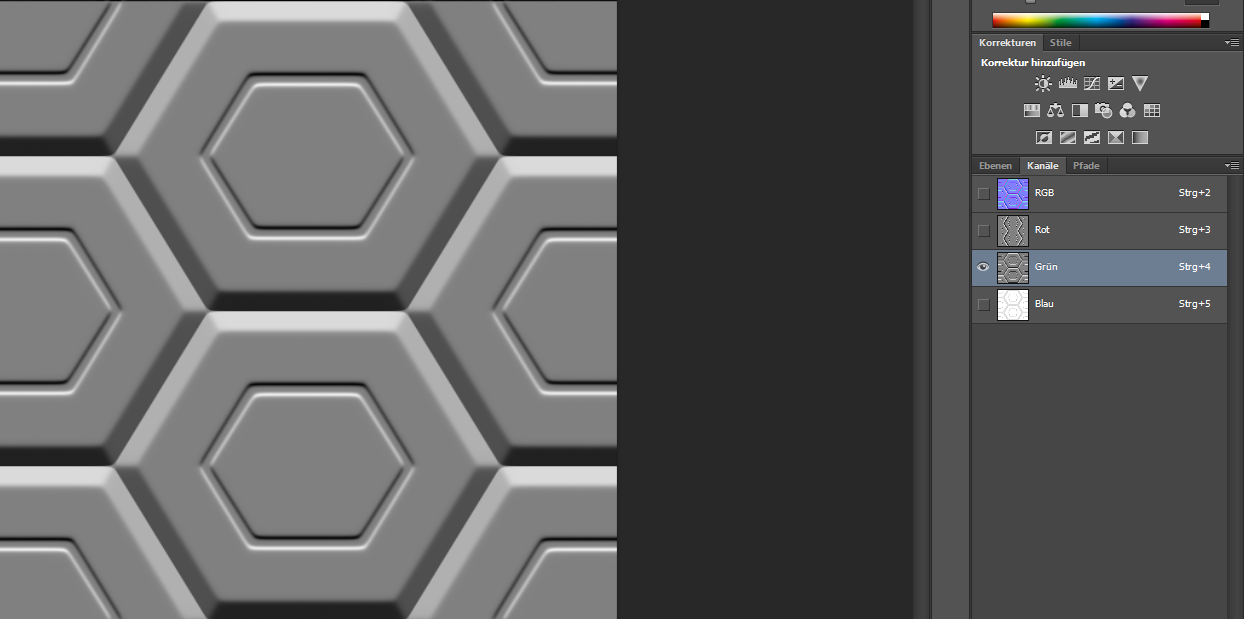
... and hit CTRL + I to invert the green channel so that it looks like this. As you can see, the light is coming from the top now. Click on the images to view full-size, since they are scaled down.
Do not forget to click on "RGB" again on the top of the Channels panel, so that you can work normally again. The next step wont work if you forget to click on RGB again.

With the normal map-layer selected, go to Image --> Adjustments --> Channelmixer.
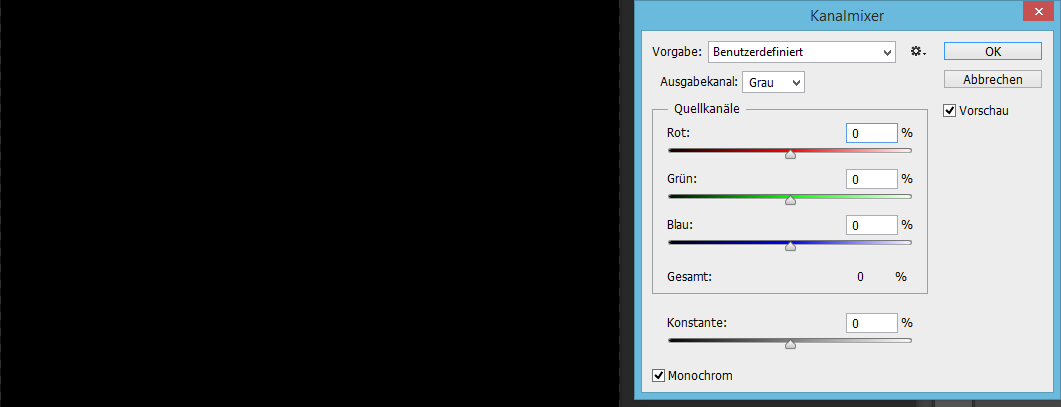
There, be sure that you tick "Monochrome" at the bottom of the dialog, and set the Red, Green and Blue Channel to 0 for now.

Now changing the individual channel strength of the red channel, you can see we can fade between the different channels. If I set Red to 100%, we only get lighting coming from the right.
You want to make sure that you are always at +100% (as it says in the dialog next to the word "Gesamt:"). If it's more than 100%, you might loose color information, because some pixels can be brighter than white.

I set both Red and Green channel to 50%, as I want the light to come from the top right. If you want the light to come from the left, instead of right, you have to invert the red channel beforehand. You can also go ahead and increase the constant value, but this changes the green channel as well which is not what you want.
I don't recommend using the blue channel at all, since it doesn't have lighting information.

After I clicked OK in the dialog, I applied an Auto-Contrast under "Image".

Now we need to duplicate the channelmixed normal map. Shut the duplicated layer off for now.

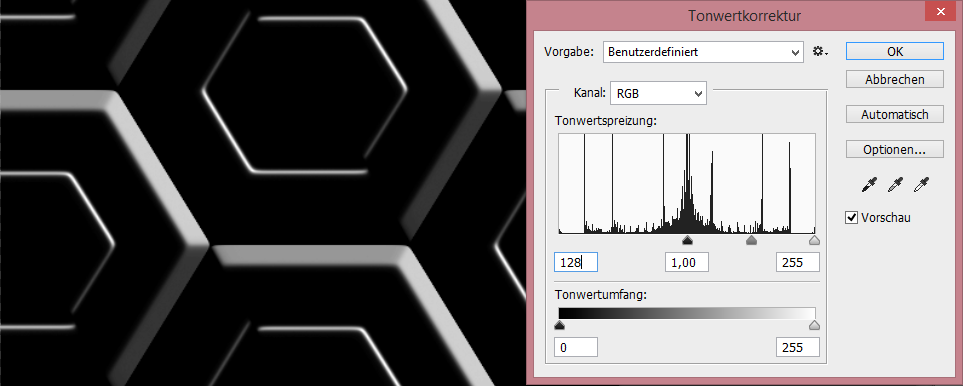
Go to Image --> Adjustments --> Levels, and set one of the values on the left or the right to 128. It's not important if you change the right or the left value first, because we have to do both anyways. You can see which one I changed.
I changed the value on the right to 128, and as you can see, this removes every additional light and just leaves us with the shadowing.
Hit OK to close the dialog.
Now show the duplicated mixed layer, and do the same thing with the Levels adjustment. But this time, use the other number and enter 128. Since I used the right value first, I now have to use the left one. As you can see right here, this removes all the shadowing, and just leaves us with the highlights.
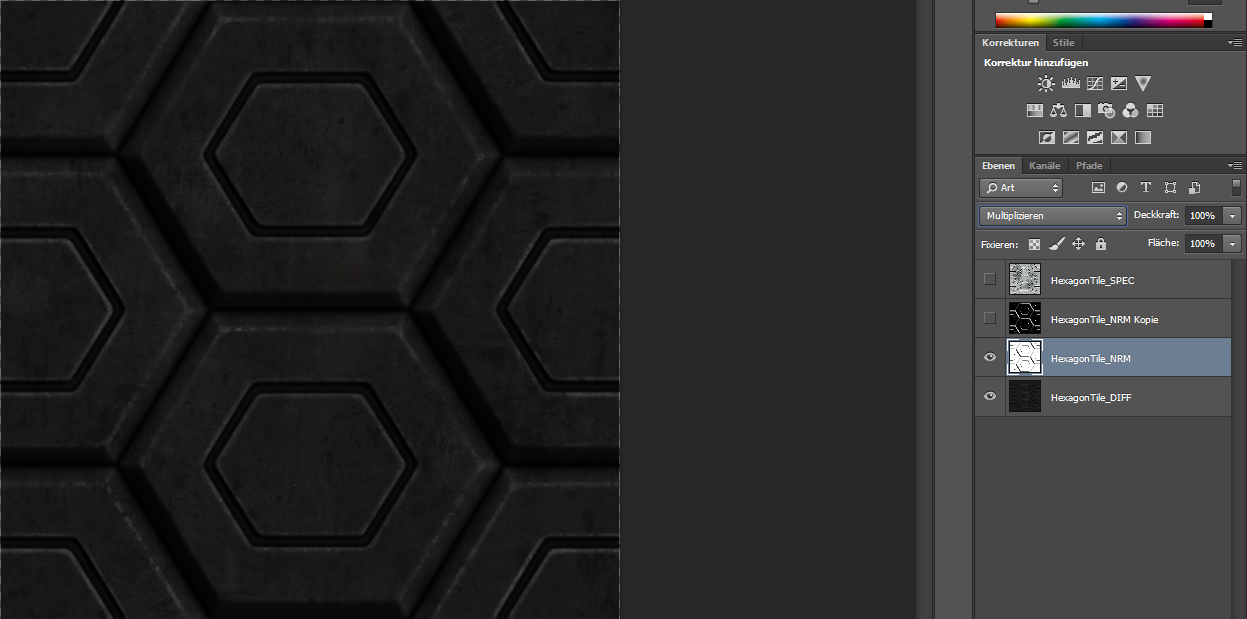
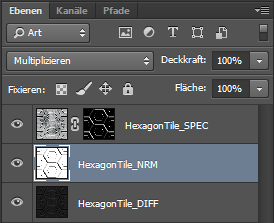
After closing this Levels adjustment, I click on our shadow layer and set it's blending mode to "Multiply", so that it looks like this.
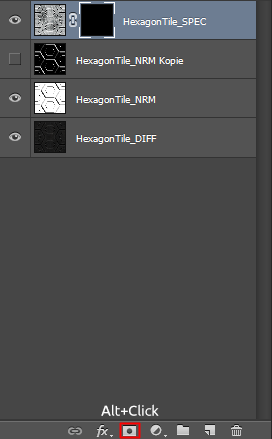
Now enable the Specular texture, and select it. Hold down ALT and click on the layer-mask icon (which looks like a japanese flag; I marked it with a red border). This will add an inverted Layermask to your specular texture, which currently makes it completely invisible.

Select the Highlight-Layer again and hit CTRL+A to select everything, and then hit CTRL+C to copy this texture.
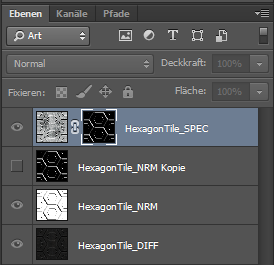
Hold down ALT and click onto the layer mask of our specular layer, so that you can work on it in the main workspace. Now hit CTRL+V to paste the copied highlight-texture into the layer mask.
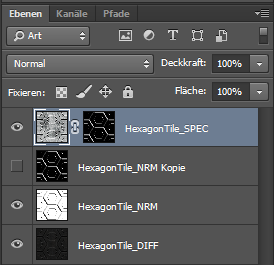
Now click onto the original thumbnail of the specular texture, to leave the layer mask and return to the original workspace.
You can now go ahead and delete the original highlight texture. We just needed to put it into the layer mask; as we already did.
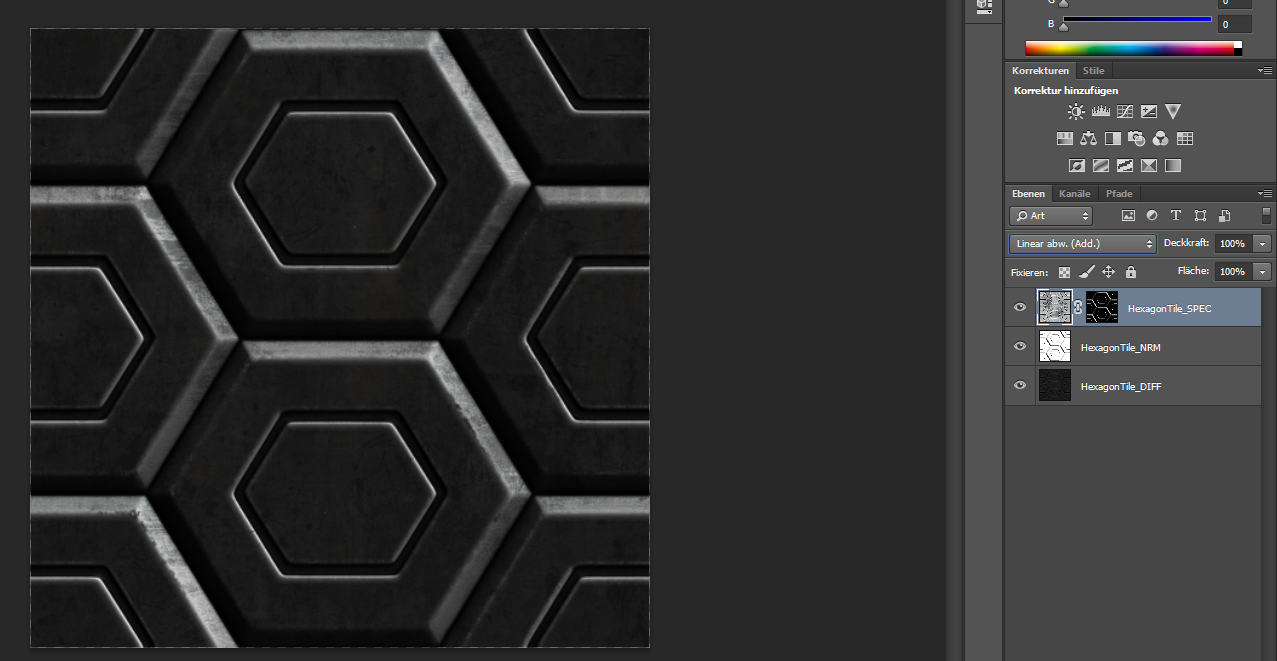
Now go ahead and select the specular layer, and set it's blending mode to "Linear Dodge" (which is "Add" in someway) or to "Screen". Both looks good, though I like the additional brightness in the Add-blending mode.
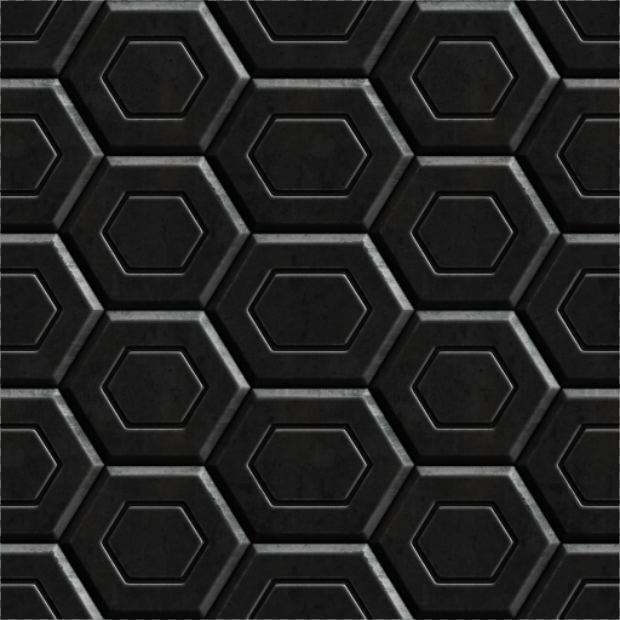
After I merged the texture, you can see that it is perfectly tileable. You can download the texture I made during this project at the attachment on this post.
I hope you find this tutorial helpful and it was understandable despite my photoshop being German.
Thank you for reading, and good luck.
-Crimi

This is useful. Thank you